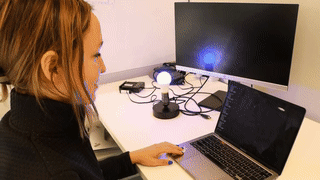
Ready to add some machine learning (ML) to your space? In this tutorial, we’ll show you how to use Viam's computer vision service and your computer’s built-in webcam for object detection when someone (aka you!) sits down at the desk—and automatically turns on a lamp.
But why stop there? You could turn this into a cozy night light for reading, a security system that alerts you when someone’s nearby, or even a bathroom light that only switches on when needed. The possibilities are endless!
This project is a perfect jumping-off point if you're new to building robots. Plus, you don’t need much hardware—just your computer and a smart plug. Let’s dive in!
What you’ll need
Hardware requirements
To start building, you’ll need:
- A computer with a webcam: While this tutorial uses a MacBook Pro, any computer running macOS or 64-bit Linux will work. To explore other cameras used for object detection, head to our guide on object detection sensors.
- Either a smart bulb or smart plug (we used the Kasa Smart Wi-Fi Plug Mini)
- Mobile phone (to download the Kasa Smart app)
- Table Lamp Base or similar
Software requirements
You’ll use the following software in this tutorial:
- Python 3.8 or newer
- Viam-server
- Viam Python SDK: This software development kit (SDK) lets you control your Viam-powered robot by writing custom scripts in the Python programming language. Install the Viam Python SDK by following these instructions.
- Project repo on GitHub
With the hardware and software in place, you’re now ready to start the project.
1. Connect to your machine with viam-server
Open the Viam app, add a new machine, and follow the step-by-step instructions to install viam-server on your computer. Once that’s done, you’ll be ready to configure your device.
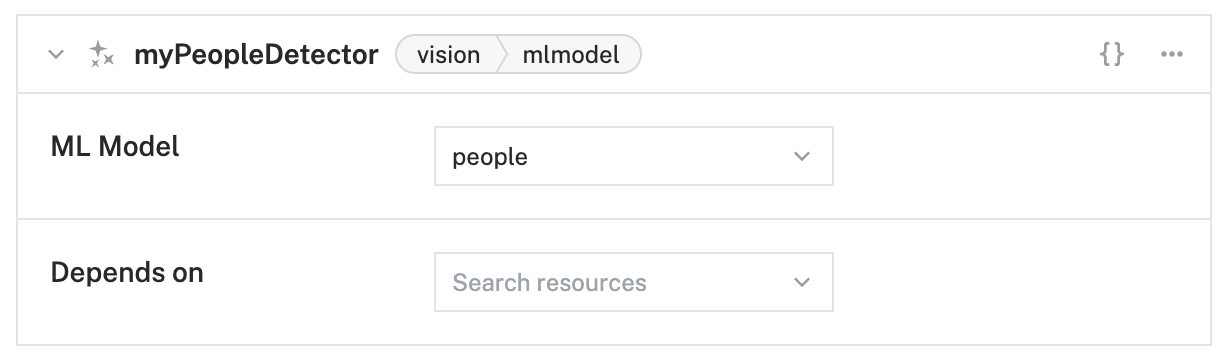
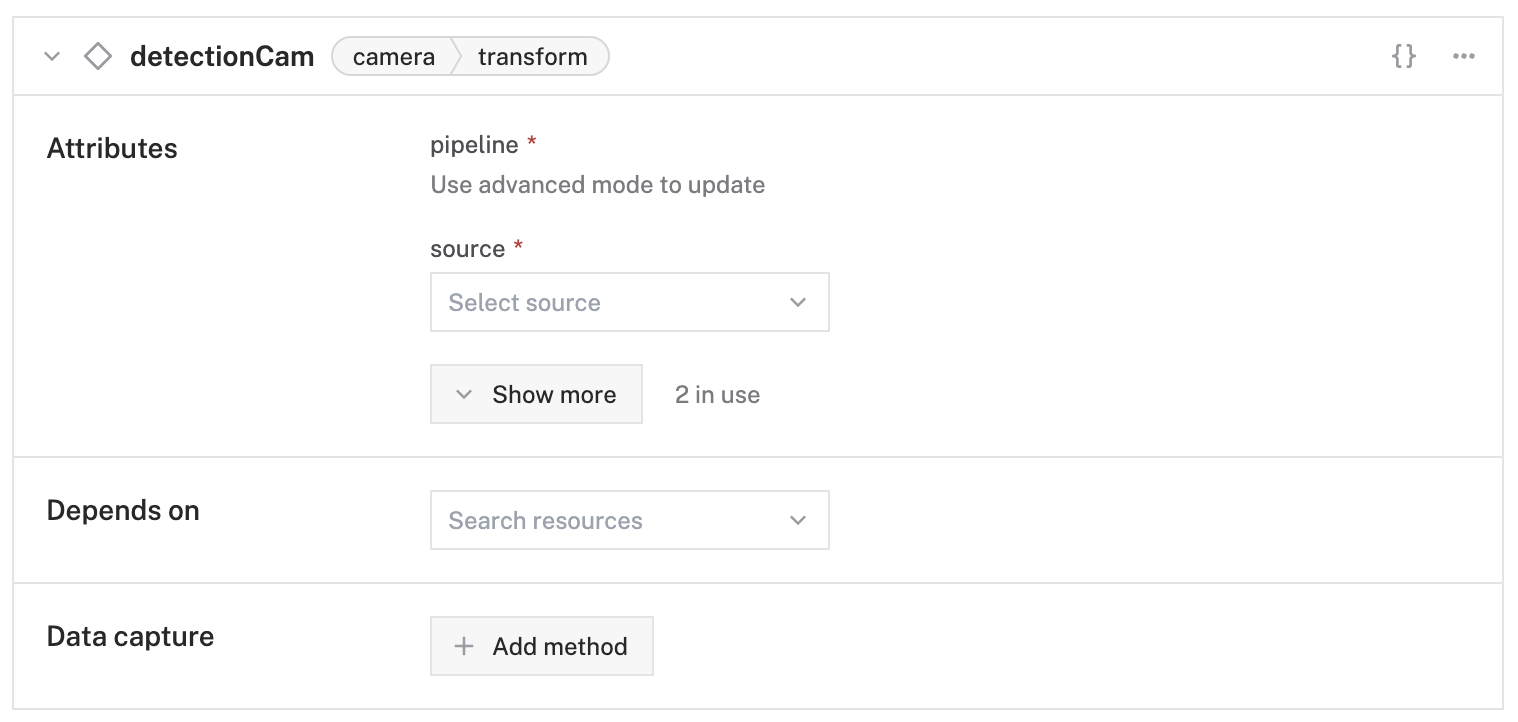
2. Configure your object detection camera
Add the component to your machine
Configure your webcam so that your machine can get the video stream from your camera:
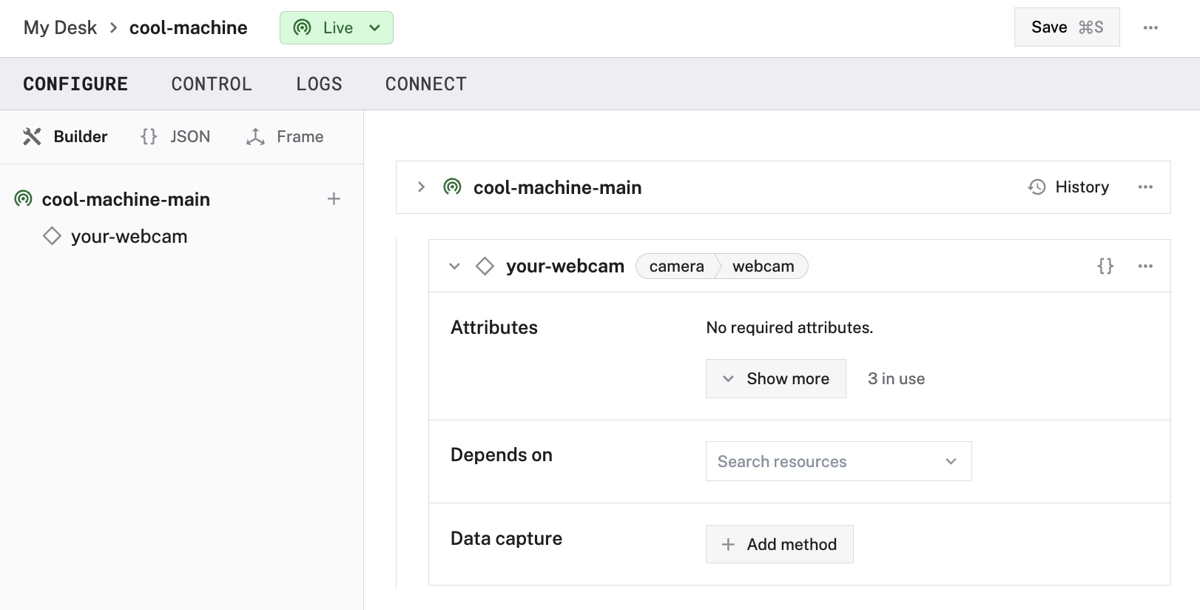
- On the Viam app, navigate to your machine’s page. Check that the part status dropdown in the upper left of the page, next to your machine’s name, reads “Live”; this indicates that your machine is turned on and that its instance of
viam-serveris in contact with the Viam app. - Click the + (Create) button next to your main part in the left-hand menu and select Component. Start typing “webcam” and select camera / webcam. Give your camera a name. This tutorial uses the name
camin all example code. Click Create. - Click the video path dropdown and select the webcam you’d like to use for this project from the list of suggestions.
- Click Save in the top right corner of the screen to save your changes.
Test your physical camera
To test your camera, go to the CONTROL tab and click to expand your camera’s panel.
Toggle View cam to the "on" position. The video feed should display. If it doesn’t, double-check that your config is saved correctly, and check the LOGS tab for errors.