

Introduction
Viam supports a broad set of popular hardware, from cameras to sensors to motors and beyond.
Most of the time, connecting the hardware to Viam is a breeze–you plug the hardware into your compute device (laptop, Raspberry Pi, etc.), select the model from a menu on app.viam.com, and follow the short set of accompanying instructions to fill out a few JSON attributes.
However, sometimes we all wish things could be even easier - what if Viam could automatically detect the attribute values?
That’s where the new discovery service comes in: it allows you to use a separate “discovery” model that queries the hardware and returns the attribute values appropriate for your particular setup.
Let’s walk through it
Here, we’ll walk through how to use the “webcam-discovery” model of the discovery service to automatically detect the right attributes for the “webcam” Camera model.
First, on your machine’s “Configure” page on app.viam.com, add the “webcam-discovery” model of the discovery service:
(The “discovery” dropdown is where you can find all the hardware for which a “discovery” service is available. This list is also available, along with details about the discovery service API, in our docs)
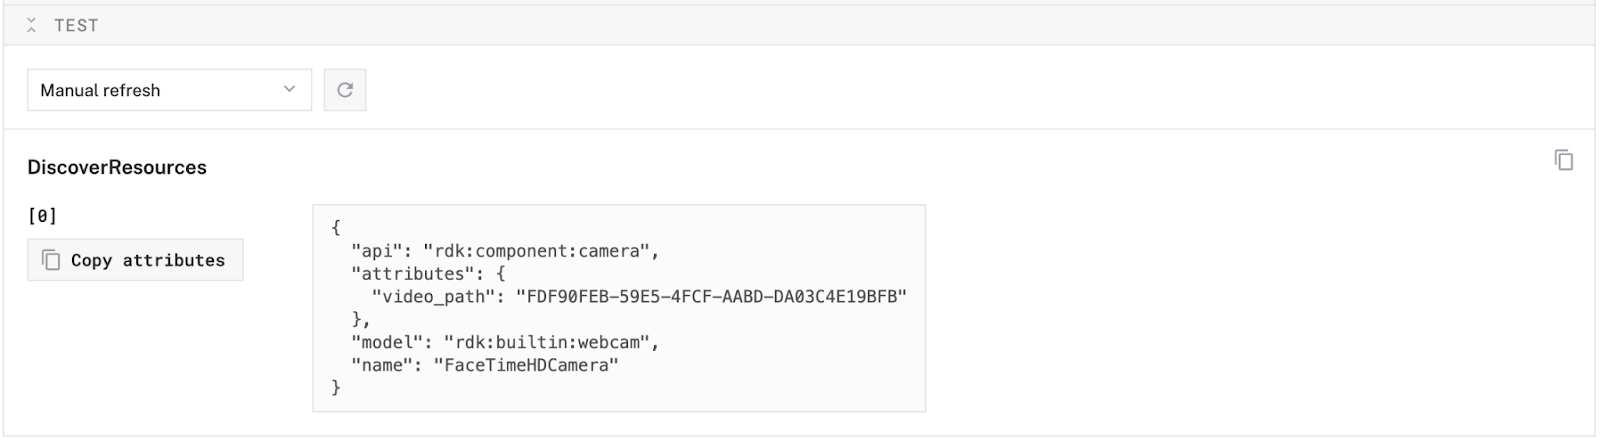
Next, make sure to save your config on the top right, then expand the “Test” section of the webcam discovery service’s config card and copy the “video_path” attribute:
Now, add the “webcam” Camera component to your config:
Finally, paste in the “video_path” value that we copied from the “webcam-discovery” service into the “video_path” field on the webcam’s config card (notice the helpful banner that points you to the “webcam-discovery” service in case you tried adding the webcam first, and got stuck trying to figure out the correct video path!):

Remember to save your config on the top right, and once your viam-server picks up the new config (within about 10 seconds), you can expand the “Test” section of the webcam’s config card to see the webcam output:

Your webcam is connected!